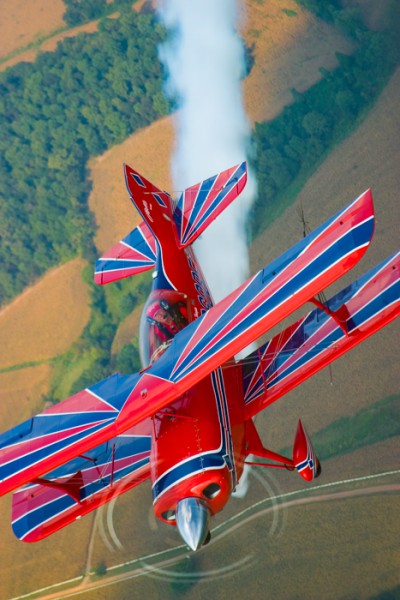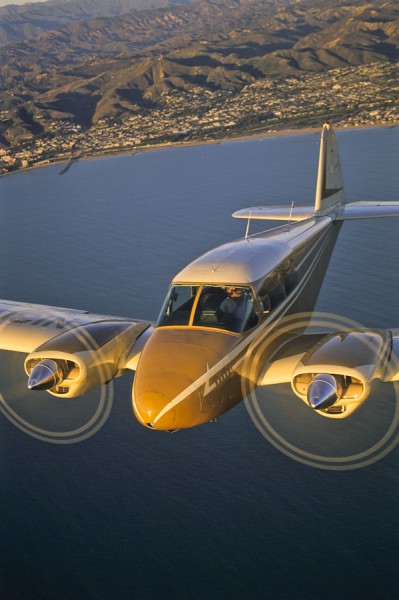
My flyin’ pal,industry leader and co-blogger Dan Johnson suggested recently that I throw some tips your way about how I put together and do air2air photography. Since I’ve done around 600 in my 30 year career, it’s not a topic I have to research, always good news. So for those of you interested in what it takes to pull off such an undertaking, here we go.
First big challenge: finding a decent photo ship. That’s tougher away from your home airport (mine was for many years Santa Paula Airport north of Los Angeles, and Long Beach Airport just south.)
My birds of prey have included:
- single-seat ultralights, flying with one hand and holding the camera with the other – that was lots of fun although I was constantly anxious about dropping the big old Nikon SLR camera I used back in the early ’80s.
- homebuilt gyrocopters and choppers(airframe vibration is a big challenge here: faster shutter speeds are important)
- Piper Saratoga/Cherokee 6, Beech Bonanza. I’ve flown many missions in these fine aircraft with the rear door and often also the cargo door removed. That brings a nice big open window to shoot out of, from the 2 o’clock back to near 6 o’clock, with the target able to be placed high, level or low relative to the camera. One of my favorite shots is putting the target above the horizontal stab, just left of the vertical fin, in a slight climb so I can get a near-head on shot of the airplane and a bit of the horizon for reference too…all without any of the photo ship intruding into the shot, which is a no no. Another advantage is it’s easier to see hand signals when the photographer’s entire body is visible.
- Cessna 150/152/172/182: All these mainstay, ubiquitous birds have one thing in common: they’re high wingers and decent photo platforms on the (relative) cheap. Your view is more restricted than a low winger, especially upward and around the wing strut, but you can still pull off a decent shoot and I’ve done a couple hundred out of these workhorses. They’re easy to find and rent everywhere, and a lot of pilots can fly them well enough as a photo ship to get the job done.
- Patty Wagstaff’s Beech Baron was a hoot: the rear seats were 86’d, I could shoot out of either rear side window, left or right, and there was a magical door in the floor, about 9″ on a side, for straight-down shots: almost impossible to get with any common GA airplane. One of my two favorite all time platforms, the other being a B-25 Mitchell medium bomber (you know, the 30 Seconds Over Tokyo bird the Doolittle Raiders used). Yeah, like we can all afford to rent one of those!
- Speaking of Warbirds: I’ve shot out of AT-6 Texans (Navy version SNJ) with a greenhouse canopy, a B-25, an Extra 300and Saia Marchetti whilst shooting aerobatics (in formation, and yes, I got sick but I didn’t barf in the airplane…only after we landed). You can shoot in the B-25 from the tail gunner position. In my case, photographing the Glacier Girl P-38 and two P-51 Mustangs in formation, you crawled down the tail tube, clipped into a couple constraints to keep you from sliding all the way out the tail and into one or a couple huge, spinning props – yes, it was completely open – and got what you got as quick as you could, since the rental was a couple thousand dollars, or more, per hour. Nothing better for head-on shots, which are impossible to get like this, hanging out the side of an airplane.
Next, the formation pilots: both yours and the target airplane’s. Without reallygood formation pilots, you’re taking unnecessary risks, plus you likely won’t get many quality shots.

Likewise, your photo ship pilot is as vital to success, and safety, as the target pilot: perhaps more so, because he/she’s got to keep the airplane stable – no sudden turns or changes in altitude or airspeed without plenty of communication firstby radio (from photo pilot or me) and hand signals (me). Surprises are enemies in formation work.
I have had my share of shoots where a willing target pilot, of course only eager to help and be part of the fun, said something like this: “Aw hellfire, I been flying formation for years, you just tell me where you want it and I’ll nail it right there for ya.”
Once airborne, that old stick’s version of “nailing it” proved akin to the inability to hit a barn with a soccer ball from three feet away. Not to be unkind: most likely, “formation” for these willing folks meant anywhere within 300 yards of me. For cross country flying, that’s fine. For photo work, that means images with a mosquito-sized airplane in the frame.
A corollary: if either pilot does something that makes you bark something like, “Pull up! He’s crossing under the plane!” or “Don’t look over your shoulder at the target, you’re turning into him!” or in general you don’lt feel it’s going well, bingo the shoot and go land to talk it over. Sweaty palms and muttered curses for more than 30 seconds do not a safe shoot make.
Moral: don’t force it. If you can’t get a target pilot to give you what you want – solid, stable positions where you need him/her to be, blow off the shoot and regroup with a different pilot. It’s not worth getting scared sick or killed for.
I always tell people in the preflight brief, “If I ask you to do anything you’re not comfortable with, just say ‘Can’t do that,’ and I’ll try something else. I once had my photo pilot tell me that the target pilot, an ex-military combat instructor type at that and an excellent stick, tell me, only after we were in the air, that the target pilot was uncomfortable getting close enough for what I needed for the story, and didn’t want to do inside turns. I got a little hot under the collar. My first question was, “Why are you telling me this now? We should have talked this out on the ground.”
My point was, things happen fast: light is constantly changing, especially during formation 360-degree turns which are great for getting lots of different looks without flying all over Creation. Inside as well as outside turns are important to get lots of variety for the art director (or you wife/husband) to appreciate and choose from.
I’m getting ahead of myself though. More basics:
The light is everything. Don’t shoot between 10 and 4 if you can help it. The first hour after sunrise and last hour before sunset (and sometimes beyond sunset) are magical golden light times. Mid day, everything picks up the blue of the sky. Warm light is much more pleasing to most people, shadows are longer and define the ground more aesthetically too.

In the air, the closer the airplane to you, the better, for you and for the target pilot . Closer equates to less zoom, which means less chance of motion blur. The more zoomed in you are, the more like trying to photograph through a telescope it becomes. In even light turbulence, forget it.
Close formation also means it’s easier for the target pilot to react to changes in the photoship’s altitude…up to a point. Bill Cox, one of the best formation pilots any photographer will ever have the good fortune to fly with, taught me this.
The photo ship should generally be the stable anchor, or “lead” of the shoot, which means the target plane should be briefed to fly on you. That means the photo ship holds whatever attitude (straight and level, climbing, descending, in a left 360 at 45 degree bank) and the target ship does its best to stay with you. Some people like to shoot with the photo pilot flying on the target, even when the photo plane is ahead, which can work if the target pilot is not a formation pilot but can at least hold heading, speed and altitude. The challenge there is the photo pilot has to be doing a lot of constant estimating of distances, while flying the plane, and looking over his/her shoulder when the airplane is behind. That’s a bit of a nerve-wracking experience, at least for me. I like keeping the piloting challenges to a minimum, and always prefer to set up shoots with us in the photo ship in the lead, providing the stable platform.
For variety, say a shot of the target doing a break as seen from behind, I’ll have it pull ahead, so the “lead” changes hands. “I’ve got the lead,” is a common radio acknowledgement. Then your photo pilot gets to show his formation chops by staying right where you ask him to stay, relative to the target. Often I’ll ask my pilot to call a break over the intercom as I’m focusing on the framing, something like this: “Tell him I want a left break, dropping the left wing down rather than z0oming up so he doesn’t disappear behind our wing, in five seconds, and count it down for him please.” Then I put all my attention into getting the shot as the break happens.
The 3 C’s: Communicate communicate communicate: Talk it out before you take off, be on radio with each other constantly and make no moves, especially putting the photo ship into a turn, without letting the target know exactly what you’re doing, backed up by a visible hand signal from you, the photographer, and when possible, sun angle permitting, only after you’ve gotten a nod and/or radio acknowledgement from the target pilot.

Don’t shoot through plexiglass if you can help it. It distorts the picture, makes the target plane less sharp, shows reflections of whatever’s catching light in your cockpit – including your bright yellow shirt! – and when they’re tinted, it’s even worse. Shoot through open air, even through a vent if you must. Most Cessna windows will open all the way up to the wing: you just have to unscrew one window strap before takeoff.
Be flexible: unless you don’t feel safe because of pilot skills or weather such as rough turbulence, keep trying things. Swap the lead: maybe your pilot is better at formation than the target pilot.
Shutter speeds: If you want a full shiny prop arc, you need to be going toward the sun within an hour of sunrise or hour before sunset, to reflect the low sun angle. Heading should be maybe 30 degrees to either side of the sun, so you’re not on a heading that blinds your target pilot.

If it’s a three blade prop and it’s turning near full throttle, 1/125th second should give you a pleasing disc. A two-blader might require 1/90 or even 1/60 second, which without a lens stablizer such as Canon and Nikon et all have, will mean lots of unwanted blurs.
For shots where prop discs aren’t so important, rack up the shutter speed as high as you can. I will shoot around 1/400th sec. or faster when I know the “propsicle” – frozen prop as if the engine had quit, which looks pretty crappy frankly – isn’t going to be a factor in the shot, such as aprofile or when the plane is going away from you or other times when it’s just not visible at all. A useful mid-range where you get some prop blur, again where it’s not a big factor in the quality of the shot, is 1/180, 1/250 or 1/320.
But technical considerations like this are always a factor of what’s required at the time, which means you need to be thinking technically to be sure you don’t muff the shot, but also creatively, for instance if you’re in a 360 and you need to move the target up in time to be just above the top of the mountain peak you know is coming up – because you saw it in the last 360 and you told both pilots to keep the turn going until you call it off.
There’s a lot more: if anyone is interested in hearing more, please leave a comment or questions.
Meanwhile, the key point is: everything is a thousand times better with two excellent formation pilots and a constant expectation that talking to each other on the ground and in the air are the most important imperatives. I’ve only had a few close calls in my career. I remember every one of them. All could have been avoided with better communication, quicker reaction when one of the pilots surprised me and the other pilot – or both.


