
Seven Airplane Photography Mistakes Not To Make
Some common slip-ups and how to avoid them so your plane pix can really shine.

With the return of airshows, it's time to dust off those lenses and take some pictures of airplanes. None of us are new to this. If you're a pilot or just an airplane nut, then you have almost certainly taken photographs of airplanes, probably lots of them. And it's also likely that many of your efforts have been less than fully satisfying. No shame. Airplanes are really hard to photograph. There are, in fact, a number of built-in challenges when it comes to photographing aircraft, often making it easier to make mistakes than not. Here at Plane & Pilot, we see endless examples of what not to do. Some of these shots-gone-wrong contain multiple, glaring examples of how easy it is to ruin a perfectly good opportunity.
There's hope, however. If you know how to look out for the mistakes lurking in the weeds and if you understand how to look for the possibilities, you'll soon be able to turn even a humdrum scene into a compelling image.
The Equipment
This article isn't about the gear you'll need to take airplane shots, but we need to discuss it if the rest of the conversation is going to make any sense.
With that disclaimer, know that in order to capture great images, you'll need cameras and lenses that are up to the task. Good news alert: Just about everyone is carrying around a high-quality camera in their pocket or purse. That's right---it's your phone. If you have a late-model mobile phone from Samsung, Apple, Google or several others, you've got a camera that can capture some great aviation shots, at least certain kinds of shots.
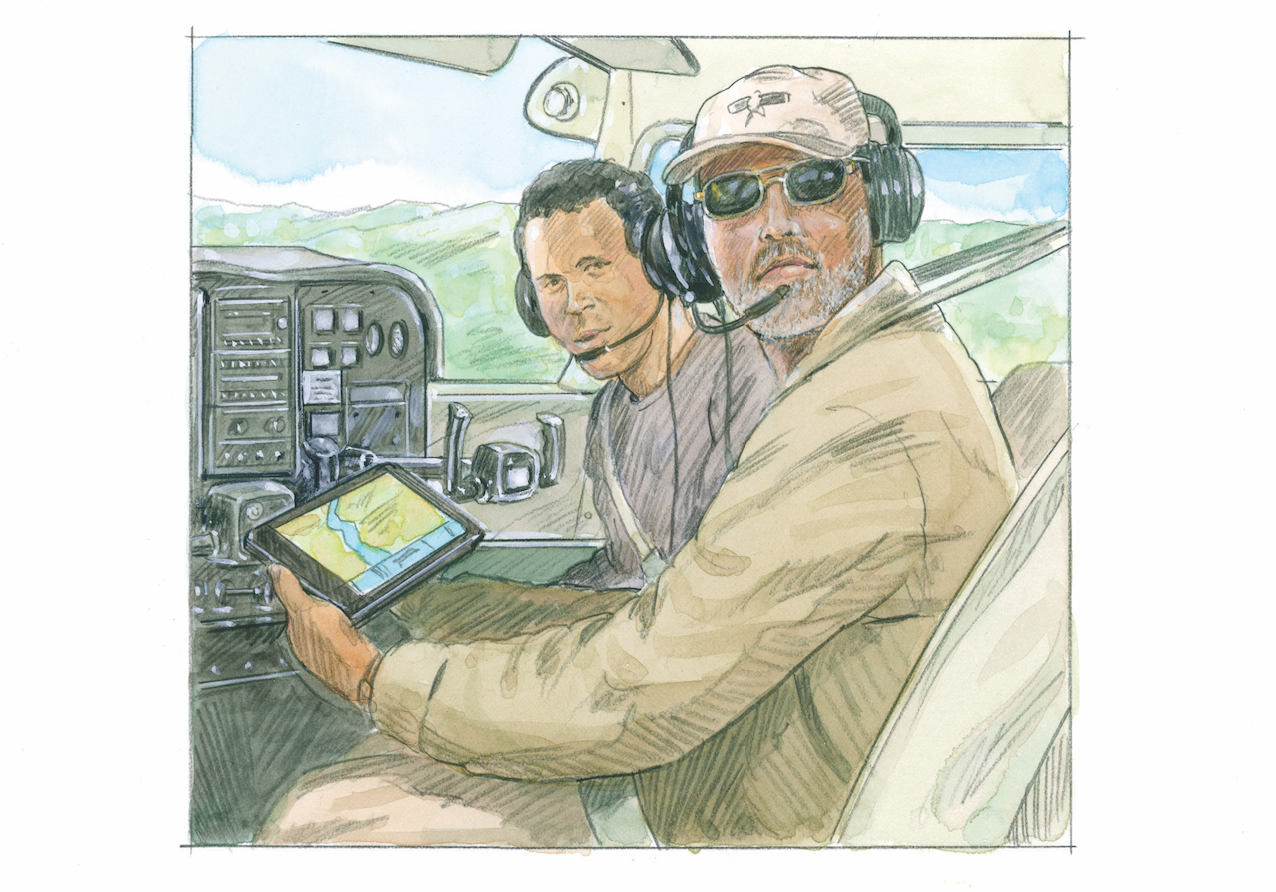
It's not even the latest model, but I use my iPhone all the time to shoot airplanes, and there are several kinds of images for which it's a great tool. It's nothing short of remarkable for taking photographs of the earth below as I fly, and it's spectacular for shooting the instrument panel (as well as various airplane details, everything from spinner to empennage both outside and inside the plane). I haven't taken a photo of a panel with a digital single-lens reflex (DSLR) for ages. My iPhone is easier to use and generates better results for my purposes.
Then again, the iPhone is useless for taking photographs of airplanes at any distance. These phones lack the optics for such uses, and they likely always will. And because it's hard to control shutter speed and aperture on a phone's camera, you can't tailor the settings to the subject as you can with a good DSLR camera. So, use your phone to take certain kinds of airplane pics, including panel pics, detail shots and snapshots galore, but don't expect it to do the impossible.
Doing the impossible (or seemingly impossible) should be left to what the pros use when they head out to the flight line...that is, a good replaceable-lens camera. Granted, in their bags the pros have four camera bodies and seven lenses, plus countless filters and adapters and other accessories, but in theory, what they use to get their shots is what we all have access to---a DSLR or a mirrorless, smaller-format camera. They aren't expensive, either. You can get a good used 35-mm DSLR with a kit lens on eBay for less than $500, less than most of us paid for our phones. And when it comes to digital cameras, even models a few generations back can take spectacular shots.
There are a handful of important considerations when choosing a camera, but the bigger issue is choosing lenses. I strongly suggest using zoom lenses, so you can zoom in or out to make the subject (airplanes mostly) the right size to fit in the frame as you imagine it. Very long telephoto lenses are great if you're a pro and are looking to capture images of aircraft flying by, but long lenses are expensive and hard to use without blurring the shot or missing it altogether.
In my experience, for general-purpose airplane photography, there's seldom need for anything longer than about 200 mm. Even then, I'd suggest a zoom lens of around 80-200 mm, which is often part of a camera kit package, along with a shorter wide/normal-range lens. The longer lens will fill most of your long-lens needs, like capturing images of planes arriving at the runway threshold, so long as you're relatively close.
That said, I seldom even pull my longer lens out of my bag, instead making use of my 18-135 zoom lens for just about all of my photography. And this includes air-to-air work, which I've been doing for more than 25 years.
A word of caution here: Air-to-air photography, which involves shooting an airplane (the subject plane) from another airplane (known as the camera plane, photo platform or camera ship) is a very specialized and high-risk form of work that I'm expressly not discussing here. Shooting air-to-air in a way that effectively mitigates the risk requires a coordinated team effort among skilled crew members, including experienced pilots and photographers. Don't attempt it without specialized training from a professional experienced in air-to-air work. Also, I won't specifically discuss taking photos while you're flying. Most pilots do it. Pick your moments and be careful. A good rule of thumb: If you feel at all uneasy about what you're planning to do, don't do it.

That all said, if you want to experiment with shooting with long lenses, 400 mm and up, an airshow is a great place to do it. I recommend borrowing or renting a lens for the event to avoid acquiring an expensive piece of equipment you might not use much. As I mentioned, they're hard to shoot with, especially while hand-holding the camera. Getting good shots with such lenses takes a lot of practice and an experienced, steady hand. Even then, you need to be pretty close to the action, but again, never, ever violate the flight line or attempt to shoot anywhere within the runway environment.

Skill
We pilots tend to have a strong sense of ability, which can work against us when learning certain kinds of skills. Photography is one of those skills. Taking good photographs means not only knowing how to adjust the camera settings to get what you want, but it also means having a nuanced understanding of the subject matter, in this case, airplanes. So you've got a bit of a head start on that. Pro photographers will chuckle at saying that the subject matters because it's so obvious. Different kinds of photographic subjects, everything from landscapes to portraits, have different characteristics and so require different techniques and equipment to shoot effectively. Summer beach scenes are incredibly high in contrast, which makes it hard to properly expose the scene. It's no mistake that almost all cinematography is done early in the morning or in the late afternoon/early evening. That's when the light is nice and the contrast is muted. Fashion photography has its own set of demands, as does landscape, portrait, automotive, sports and, well, you get the idea. Just because you're good at one kind of photography doesn't make you good at a new kind. It's humbling, but it's true.
In terms of its specific challenges, aviation photography is arguably the worst, and with so many different kinds of weird and conflicting considerations, it just seems unfair. Some of the issues can be dealt with, and we'll get into those strategies, while others need to be worked around.
Know The Challenges
When taking pictures of airplanes, there are several common mistakes that are easy to make. It might be more accurate to say that they are really hard not to make. We see amateur photos all the time that are shining examples of what not to do. Sometimes these images contain multiple mistakes. Sometimes they would have been really good or even great photographs had it not been for one glaring error.
Here are some of those common mistakes and how to avoid them. Be forewarned, though. The reason taking great photos of planes is so hard is because most of these mistakes are built into the subject and the setting in which they're usually shot. There are, in many instances, physical constraints that you can't think, finesse or power your way through. You've got to understand them, respect them and work within your limitations and theirs.
1. You're too far away.
Airplanes are small and the sky is big. With rare exceptions, no one wants to see a photo of the sky with a dot directly in the middle of it. There are a couple of obvious solutions for this. One, you should get closer, though that's often easier said than done. You can use a telephoto lens, which we highly recommend, though doing so will make it harder to keep the camera steady and more difficult to find the plane in the viewfinder. Moreover, if the plane is really small in the sky, even a long lens won't help much. If you're shooting with your phone, well, there's probably little you can do to solve this problem, so save your shooting finger for better chances. The other thing you can do is get closer to the planes, though, again, that can be hard to pull off. At Oshkosh, the gaggles of orange-vested pro photographers roaming the flight line where mere mortals are forbidden to go is evidence that if you want great stuff, you need to get close. But whatever you do, follow airport rules and don't violate any off-limits areas. More than one eager photographer has found him or herself in the back of a squad car. In general, get closer, use longer lenses and very often, just hold off until the plane gets closer.
2. You stopped the prop.
This is by far the greatest challenge in aviation photography, and I'll go into a little detail on this so you understand the nature of the issue. For starters, the reason you don't want your image of a Corsair racing past to have a stopped prop frozen in a thin slice of time is that, to use the technical jargon, it just looks stupid.
The idea of a photograph is to capture the experience we have with our own eyes, and if you were to see a Corsair flying by with its prop stopped, well, you'd be understandably freaked out and instantly calculating its forced landing options. Instead, we want to see that big beautiful bird with its supernaturally long prop blurred out, at least to some great degree, so the viewer can see that the prop is turning as God and nature intended.
It's not a binary problem, however. Completely stopped is bad, but how about "mostly" stopped? The question of how "stopped" is "too stopped" is at heart a philosophical one, but suffice it to say that you need at least a hint of the prop moving---the more, the better. The greatest shots of airplanes in flight show a full, buttery prop blur, an effect that is never achieved by mistake and is essentially impossible (or darned close to it) to achieve from the ground.
But how does one keep the prop from being frozen in time? By using a slow shutter speed. Sounds simple enough, right? How I wish that were true!
Without going into too much technical detail, the shutter speed is simply how fast the shutter opens and closes. A fast shutter speed is great for avoiding blur, which is one of its greatest advantages. But the airplanes we are mostly concerned with in Plane & Pilot have propellers for the most part, and that makes them hugely problematic. Here's why.
In order to get a good prop blur (which, again, makes it look as though the prop is still doing its thing), you need to shoot with a slow shutter speed, which allows the shutter to be open long enough to "see" the prop moving through its arc. And if you're thinking that a shot of an airplane with its prop blurred throughout its 360-degree travel must be taken at really slow shutter speeds, you're right. Impossibly slow shutter speeds, too!
A couple of other things. As a pilot, you know that the prop doesn't spin at one rate. The tips spin much, much, much faster than the roots, and the longer the prop, the more pronounced this effect is. So as you begin to slow the prop, you'll begin to see a weird and wholly unnatural effect, sometimes referred to as the Go-Pro effect (after the popular action cam), in which the prop appears to be made of rubber. That, too, is unsettling.
So what do you do?
You can use a slower shutter speed by putting the camera in manual exposure mode or by selecting the shutter priority mode, often depicted as the "S" on the selector dial. This allows you to select the shutter speed. Remember, the slower the better, up to a point, and the camera will automatically pick what it calculates to be the proper aperture (which is how wide the lens is selected to open). If you select 1/100 of a second---and I promise that this technical part of the program will be over in a flash---on a bright day, the camera will choose a small aperture. That's because the longer the shutter is open, the more light the lens gathers. To compensate for the long exposure, the camera picks a narrow opening.

Here's the rub. When you slow down the shutter speed enough to capture a good prop arc, you're also keeping the shutter open long enough to capture every little shake and shimmy that occurs while it's open, which is why some photos look blurry. If you're using a slow shutter speed, like 1/100 of a second, while hand-holding the camera, you need to be really steady not to get a blurry image. Few photographers are good or lucky enough to pull it off. A speed of 1/125 will get you some prop stopping in most instances, and 1/150 will begin to stop the prop noticeably, but in many instances acceptably. How slow is the shutter speed on the best air-to-air images? Around 1/60 of a second, which can only be reliably achieved with a gyroscopic stabilizer, which alone costs more than the entire camera outfits most of us use.
So, shutter speed is a dilemma. It is, in fact, the defining dilemma of aviation photography (for planes with propellers, at least).
So what's the solution? Well, image stabilization, whether it's in-camera or in-lens, is a start, but it only gets you a small degree of improvement. What you need to do is get good with making the camera as steady as possible. Keep the camera close to your body with your elbows pressed steadily into your core while gripping the camera lightly but firmly---yes, it seems contradictory but isn't---and then, when you activate the shutter, do so very lightly. Practice with it and see how the results come out.
You can also use a tripod or, better yet, a monopod, or brace against a solid object. All of these make it harder to find the plane in the viewfinder and follow the action, though. Plus, it makes it practically impossible to pan while shooting.
If you're using a mobile phone, there are a few gimmicks you can try. You can trick the camera into using a slower shutter speed by overlaying the lens with a neutral density filter. Today on some phones or with specialized apps, you can turn your phone into a manual exposure model, though this varies greatly from camera to camera and app to app, and the results are often less than ideal. Regardless, try them out. It might be fun.
3. You cut something off.
Airplanes are funny things, shaped so that they're exactly the wrong form factor to fit on a vertical magazine cover, for instance. Over the years, certain conventions have arisen about what you can and can't cut off in the frame. It is, for example, okay to cut the outside part of the wings off in a shot, but don't ever cut off the spinner or the landing gear. Why? I don't know. I can only say that it's because the photo looks terrible if you do. For some reason, we as pilots need to see the gear. Why, I have no idea, but we do. Also, bear in mind that it's not enough to make sure the gear or the spinner is in the frame...you need to give it a little margin. Why? Again, who knows. But it's a known effect that crowding the margins makes the viewer feel a sense of unease. So don't do it! It's not only airplane photography that's subject to these kinds of cropping aesthetics. If you're taking a photo of a person and crop it so only the feet are missing, it's just as weird.
4. Your scene is too busy.
Most of us get the chance to photograph cool planes when we see them at an airshow. It's as true for me as it is for you. But it's complicated because there are often crowds of people surrounding the planes you most want to shoot, and no one wants to see a shot of a plane with a dozen other people milling about in their khaki shorts and wide-brimmed hats, blocking the view and stealing focus, literally and otherwise. Luckily, there are a few solutions, none ideal, but all workable.
First, get out of bed! If you rise early and go photo hunting just after dawn, not only will you be rewarded with great light, but also the usual throngs of airshow goers will be nowhere to be seen.
You can also practice patience. Frame up the shot and wait for the scene to clear. Many of my shots of airplanes apparently sitting by themselves on the ramp were ones I snapped off in the half-second gaps between airshow goers wandering by in front of my lens.
Last, focus on a particularly interesting detail, perhaps the one that makes the plane so noteworthy, like the exhaust stacks of a Merlin V-12 on a P-51 or the rivet lines on a Spartan Executive. Logos, reflections, spinners, door hardware, interesting tail shapes are all among the endless detail possibilities if the crowds are too great to get a shot of the entire airplane.
5. You put it in the center of the frame.
A photograph is only partly about the subject. How the subject, in this case, an airplane, is placed in the frame matters. So does context.
Is the plane you're shooting at an airshow, or is it zooming through a narrow Swiss valley? Think about it. A little context can sometimes make a good photograph great.
Think, too, about how you place the plane in the frame. You might have heard of the Rule of Thirds in photography, where good composition divides the frame into thirds and places elements of the shot in each third. The theory is vague and overly simplistic, in my opinion, and it doesn't apply well to airplanes in general, but thinking about it will help in two ways. First, you'll think twice about putting the plane dab in the middle of the frame, and, second, you'll at least begin to think about including other elements. A shot of a Reno racer, let's say a highly modified Sea Fury, in flight is interesting. The shot of the same plane rounding a pylon with a Mustang hot on its tail is an edge-of-your-seat story.
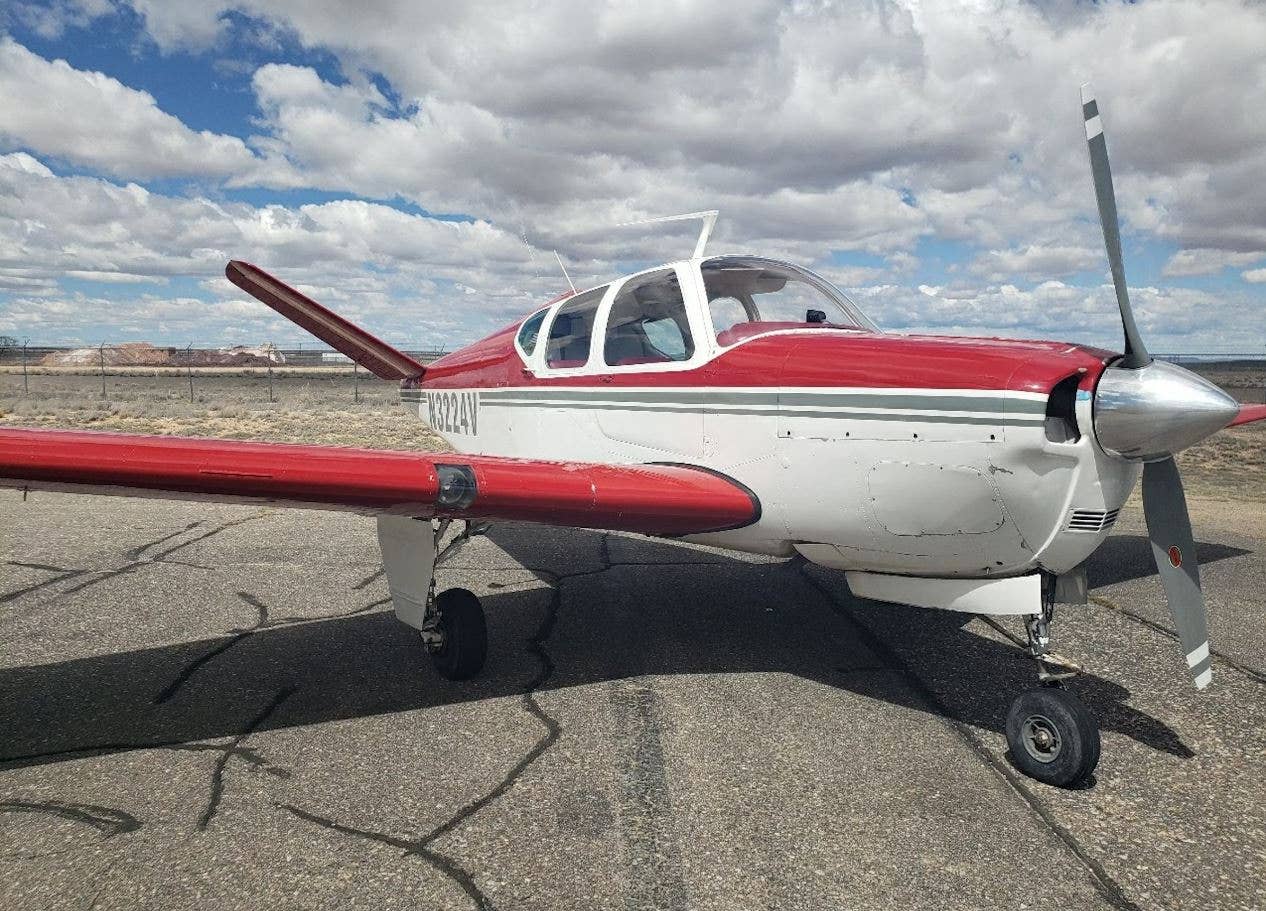
Also, avoid getting too much empty space into the shot, unless it somehow enhances the meaning, like a lone plane sitting at the departure end of a desolate desert dirt strip. Getting the desert and the runway in that shot transforms it.
6. Nothing is happening!
In the example above of the Reno racer rounding a pylon, the action is obvious. With others, it's not quite as obvious. Some possibilities include framing multiple airplanes together, adding ground elements (mountains in the background, crowds looking up in awe or smoke trails). A special word about smoke: Photographers love it! And it's no mistake that they do. Airshow performers use smoke for the express reason that it adds visual interest for the spectators on the ground far below. The performers know their planes are small and not particularly impressive from any distance, no matter how they carve shapes in the sky. Smoke adds elements of action, motion and time, all of which work together to make a still shot come to life.
7. You didn't fix it.
Traditionalist photographers will tell you that you should do all the work before you click the shutter. They believe that adding effects, like filters or focus enhancements, is cheating. With all due respect, they're both out of touch and wrong. A photograph is meant to be seen. Why else take it? So if you can enhance the viewers' experience by fixing it later on your computer or your phone, why not do it? When it comes to digital photographs, the sky's the limit to what you can do after you've already captured an image. Add any number of filters to make it pop, crop it to take out dead air or remove distracting elements. Or enhance the detail in the areas that are too dark or too light. You can do this with expensive desktop computer programs that cost as much as a thousand dollars or more, or you can do it with free apps on your phone. In today's imaging world, the mistake you made when you took the shot might be unfixable. Or maybe not.
Taking photographs of airplanes is something many of us love to do. Luckily, you don't need to have tens of thousands of dollars' worth of equipment to do it, and you don't need to be an expert in optics or digital sensors to take some great pics of some amazing airplanes. Just do a little planning. Take in the scene in front of you, compose it, expose it and frame it up before you snap. Then when you get home, take a look at what you've got and by all means make it better if you can. By putting a little thought and work into the process, you can take much more rewarding and satisfying airplane photos in no time. And that will make all of us airplane nuts happy.


Subscribe to Our Newsletter
Get the latest Plane & Pilot Magazine stories delivered directly to your inbox