

You know the sound. You get in your vehicle, put the key in the ignition, turn the key, and hear the starter turn over in a slow, ow, ow, ow growl…until it dies. You have a dead battery, and you need a jump to get going. So you jump it. Once you have it started, your alternator should recharge the battery in flight, so watch your ammeter. But if you need a jump-start on a frequent basis, it is time to examine your starting system. Often, a frequently dead battery is only the symptom of a bigger issue.
Worried about getting stuck somewhere with a dead battery and no way to get going again, I set out to solve my starting issues. At annual inspection time, I sat down with my friendly neighborhood A&P and discussed my problem. I knew that the battery in my Cherokee was located all the way behind the baggage area bulkhead. I suspected that this might be the cause of the slow starter.
Because of their light weight and cheap cost, aluminum battery cables were used by a number of aircraft manufacturers. While aluminum is a great conductor, over time aluminum battery cables can develop corrosion of the wires and connectors. Once the corrosion sets in, the cable becomes an inline series resistor and, combined with the high starter current, develops a significant voltage drop along your battery cable. This reduces the voltage that is available for the starter motor and slows down the starter. Adding to the problem, the undesirable resistance becomes a heat source and could eventually cause bigger problems.
Over the years, most of my cables had already been replaced with copper, but the long run from the Master solenoid to the Starter solenoid on the firewall was still aluminum. After some discussion of what needed to be done and how to do it, I was given the “go-ahead” to tackle the job. I was under the supervision of a qualified A&P mechanic throughout the task.
For a step-by-step look at the process, see the Replacing Your Battery Cables photo gallery.
Believe it or not, you can also make your own custom cables, which, since I’m a hands-on kind of guy, was my solution. I started by carefully removing all of the interior panels necessary for access to the battery cable. My seats were already out, since we were performing the annual inspection. A lot of parts bags, and several different right-angle screwdrivers, were necessary to carefully remove all of the interior trim and panels. Making sure to bag every screw and then tying them off to the appropriate interior piece makes reassembly much easier.
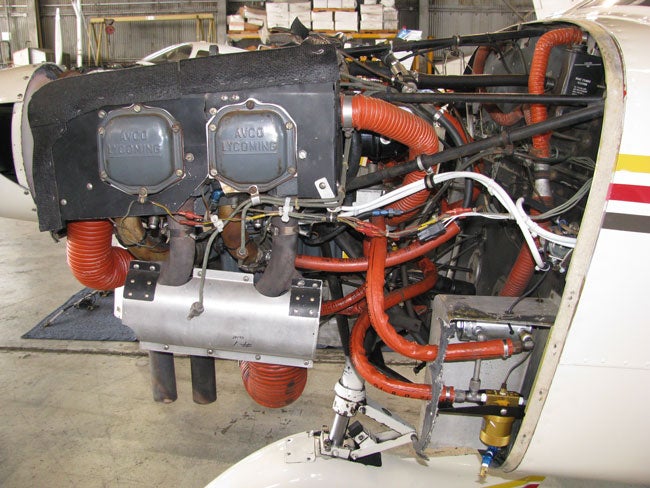
The parts department ordered 20 feet of aviation-grade AN-2 copper wire as specified in the Service Bulletin, as well as several terminals. I studied the routing of the existing cable and noted the locations of any clamps used to secure the cable. The cable passes through an opening in the lower left firewall into the engine compartment. This pass-through is sealed and must be resealed with an appropriate caulk after the cable is installed.
I started in the middle of the run, cutting the existing cable and pulling it through the airframe. As I pulled the old cable out, I pushed the new cable through its path, first toward the rear of the airplane, then toward the front. After adjusting the slack in the cable, front and rear, I cut the cable. I was left with cable ends ready for terminals at the Master solenoid and the Starter solenoid. When I cut the cable, I provided enough slack to replace the terminal connections, if it ever became necessary.
Preparing the cable for the terminal is fairly simple, but you must use care to minimize damage on the copper strands when you strip the wire. This prevents fatigue failure of the outer layer of copper strands. Once you have the end stripped and ready for a terminal, you need to test fit the cable one more time. A trick I learned is to determine the position of the terminal on the cable that places minimal strain on the connection, and put a mark on both the cable and terminal with a marker to allow you to crimp the terminal in the correct orientation, finishing it with shrink-wrap.
Crimping the cable is done with a large crimping tool. Borrow one if you can. Good ones aren’t cheap. Luckily, our shop has one that looks old but does a great job. It has a knurled knob that adjusts the stroke of the crimper. Find the location that matches your cable size, make the adjustment, and it is ready to go. Line up your marks, make sure the shrink-wrap is in place, and crimp away. While it could probably be done solo, it sure helps to have someone help with this operation.
Once both ends are done, all that is left is to secure the cable at both ends and replace the interior pieces.
So, was it worth it? The first time I hit the starter, it turned over like a new airplane. The airport owner asked me afterward if I installed a new starter. We were both amazed at the difference. The increased cranking speed also results in easier starts, since the magnetos are spinning faster and produce a higher cranking voltage, making for consistently happy starts.
Denny Kotz is a retired mechanical engineer who, after a lifetime of dreaming about flying, earned his certificate at the age of 63. A native of Sandusky, Ohio, he has lived in North Augusta, South Carolina, since 1981. Another one of his passions is performing music, and he is a member of the Flying Musicians Association.