
ADS-B Installation Gallery
My original transponder installation in my panel. A Narco 50A. The transponder worked fine when I bought the airplane two years ago, but it was failing and obsolete. It was…

My original transponder installation in my panel. A Narco 50A. The transponder worked fine when I bought the airplane two years ago, but it was failing and obsolete. It was not worth repairing.


The Narco 50A rack, transponder and encoder. Out with the old to make way for the new. The weight of the old equipment was recorded in order to update the weight and balance for my airplane.
The installation begins with the installation of the new rack in the panel. The rack easily fit in the old location between the frame rails. Some new mounting holes were necessary for installation.
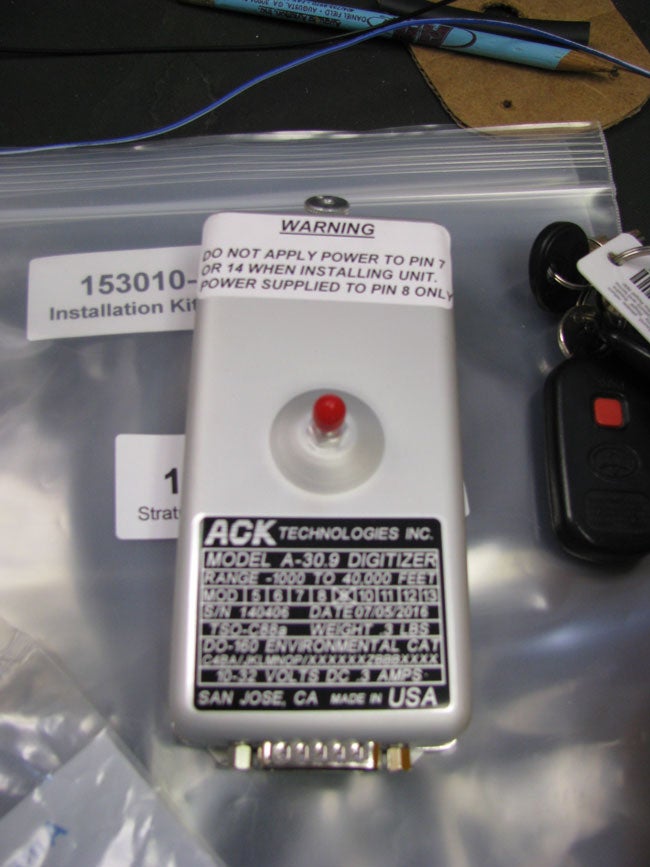
My new encoder. Only 3 wires required, and improved accuracy. The older encoder could have worked, but it provides 200 ft. accuracy, while the new encoder provides 25 ft. accuracy.

The new hole in my airplane. Gulp. That made me nervous. Once it is drilled, you can't change your mind on where you want your antenna. Jacob used a step drill in the thin sheet metal. I sat inside with a cup under the skin to catch the metal shavings.

My new GPS antenna with the new cable installed. Jacob also made a doubler to strengthen the installation per the installation instructions.

My new GPS antenna before it was installed. An O-ring is provided to seal the antenna to the fuselage. In addition, a sealant was applied to the perimeter of the antenna in order to ensure leak-free operation no matter what the environmental conditions.

My two new antenna cables. One of the cables goes to the whip antenna located on the belly of my airplane, and the other one goes to my new GPS antenna. The cables were routed down the right side of the cabin, under the rear seat, and through the baggage area to the rear of the fuselage using existing cable routing.

My new GPS antenna location. It must not be shadowed by other antennas, which required measuring from the proposed location to the other antennas in that location. Getting it straight was done using our eyes from several different locations. There were no definite body lines to follow. Several minutes were devoted to checking the orientation of the antenna from every angle. Once we were satisfied, the four mounting holes were drilled. Once again, I sat inside the airplane with a cup to catch the metal while Jacob drilled the holes.

Close-up of my new GPS antenna.

My new Stratus ESG Transponder and my Stratus 2S. The 2S is connected by an antenna and power cable inside an open bay in my panel. The Stratus 2S obtains satellite information from the newly installed GPS antenna, so it no longer has to have a visible view of the sky. However, it must retain the proper fore and aft orientation in order to provide the necessary attitude information.

The cover over the open bay in my panel. I am trying different locations for mounting my iPad before having a new cover fabricated that will look a little nicer.
Subscribe to Our Newsletter
Get the latest Plane & Pilot Magazine stories delivered directly to your inbox